Paper Chain Snake DIY
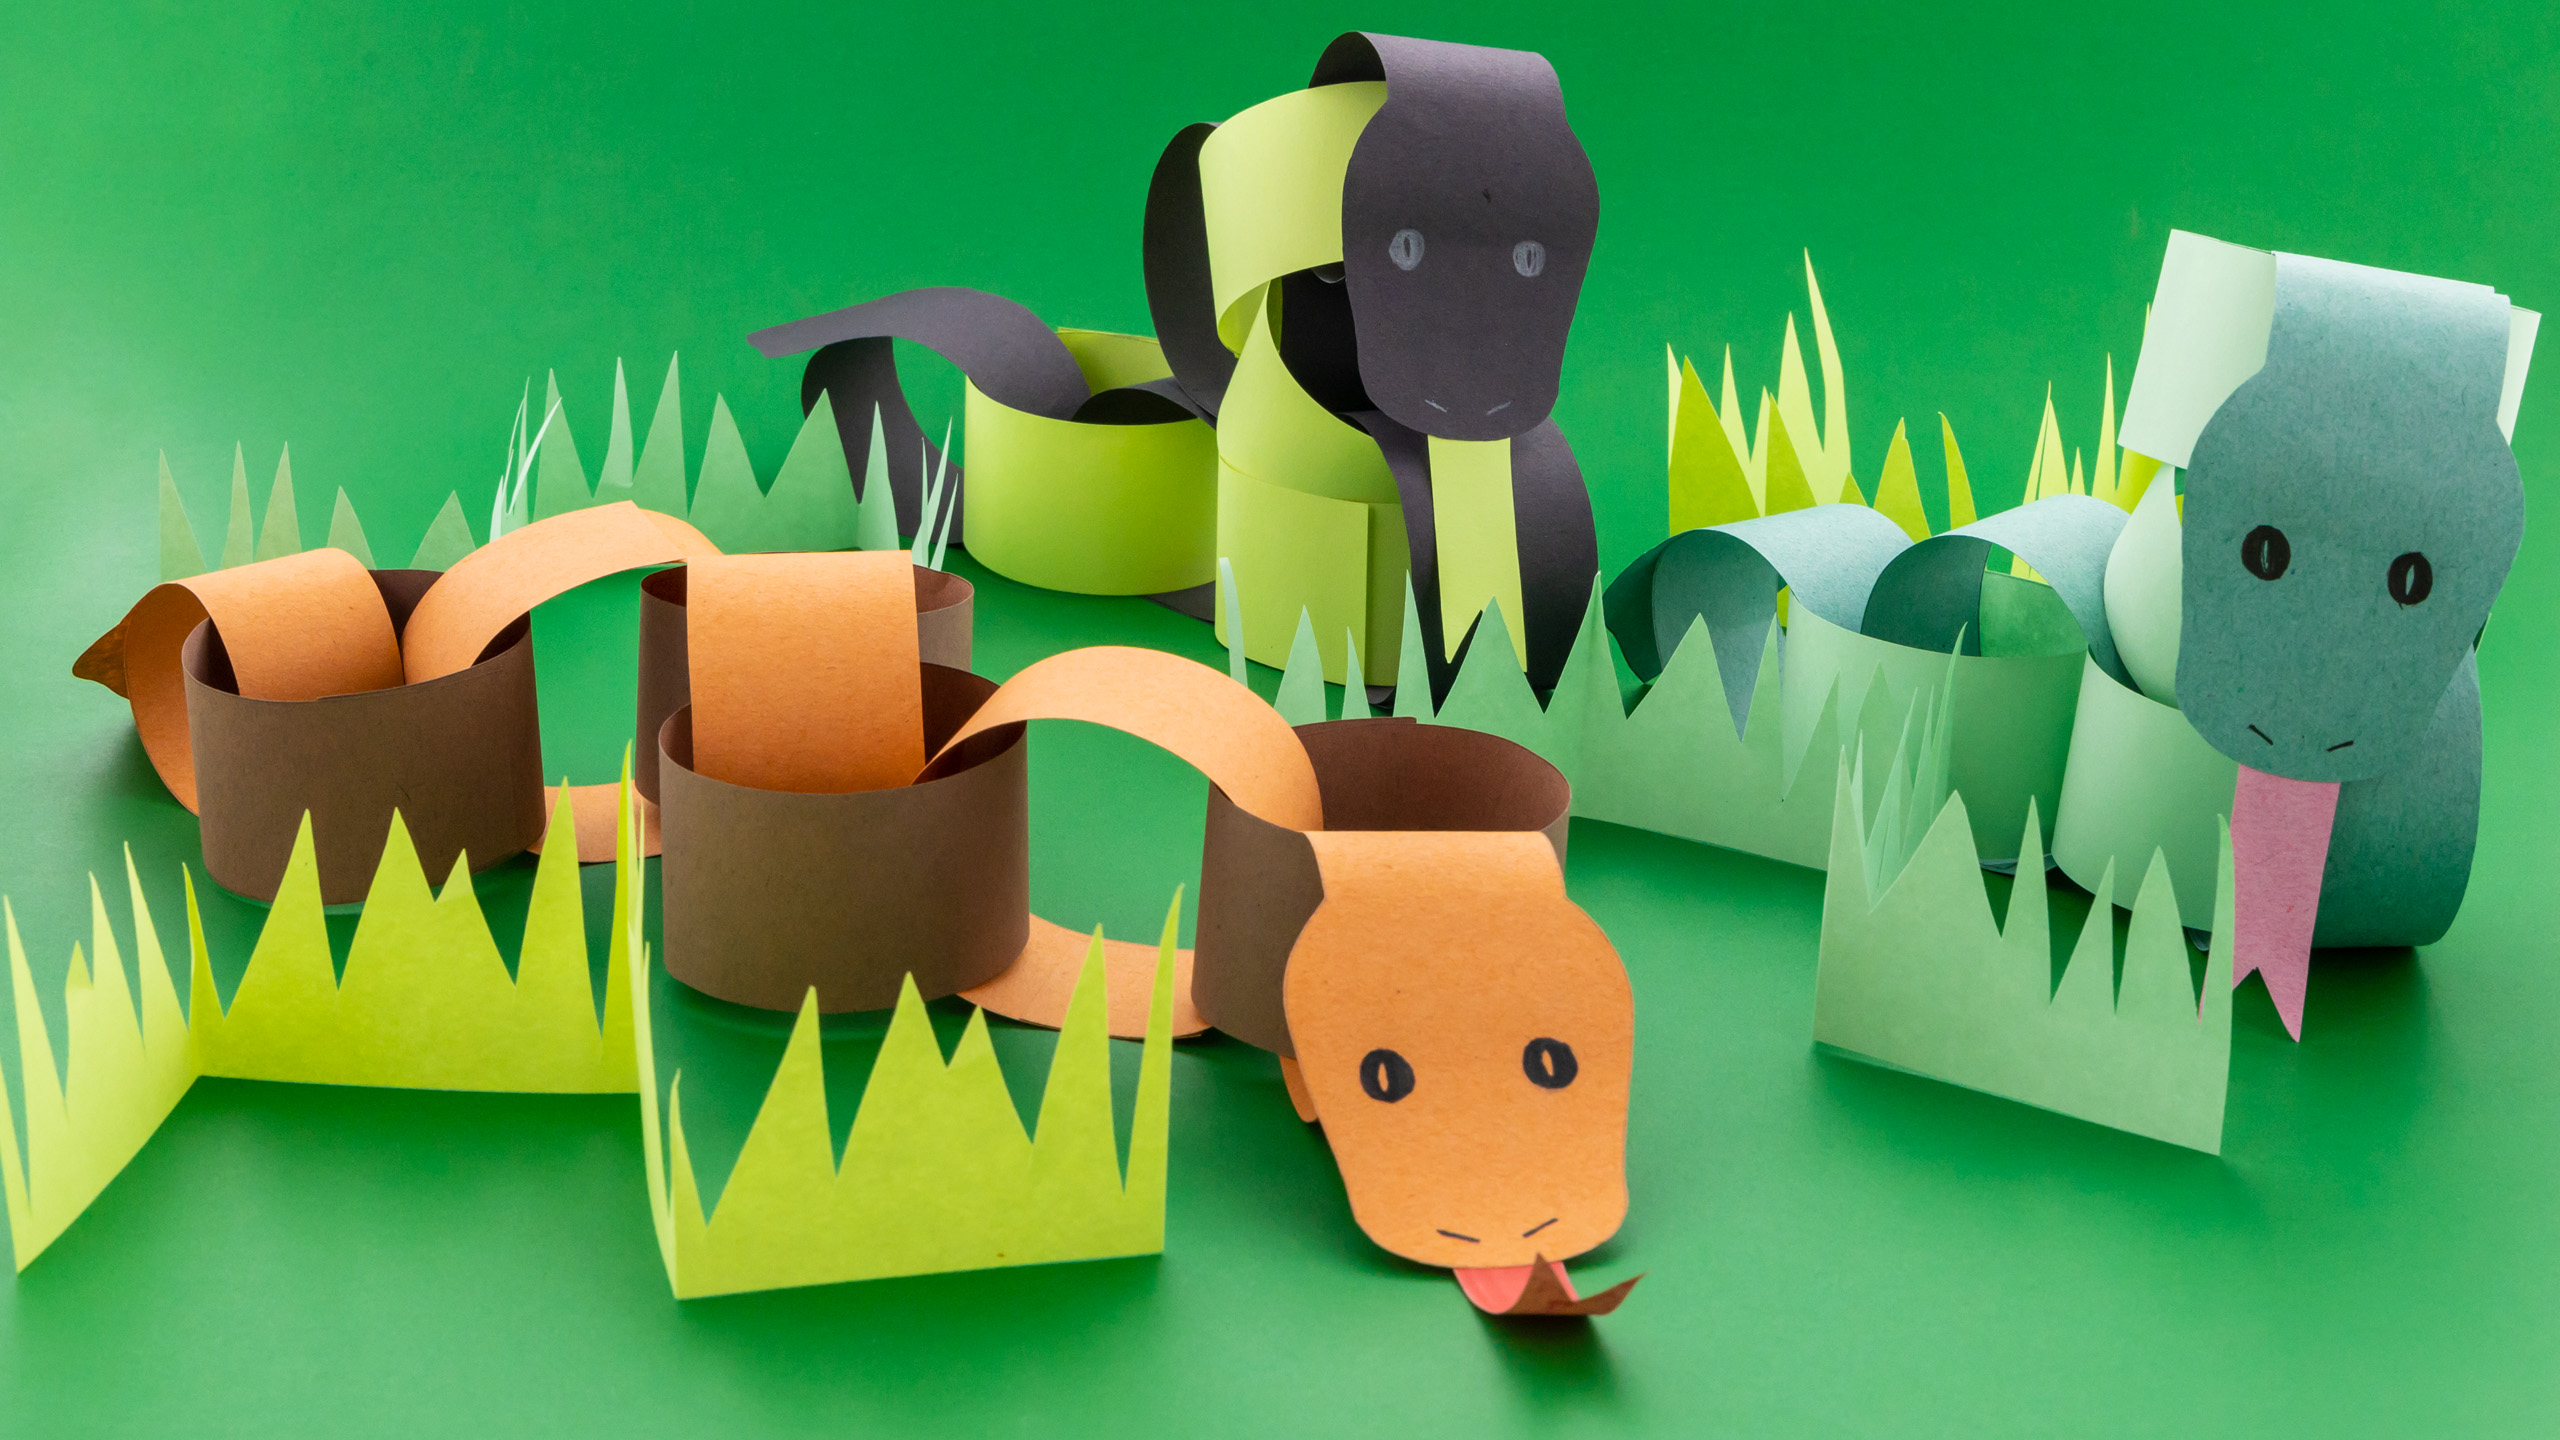
Slither-in the summer with this “lively” Paper Chain Snake DIY 🐍 It’s so fun to make! Especially when you make the snake veeery long 😁
Materials you will need:
- Construction / Color Paper
- Adhesive
- Scissors
- Pencil
- Markers (to color / decorate)
Note: in these steps, we are creating a snake using construction / color paper. You can also color straight on to the template and then follow Step 4 from there.
Step 1: Gather materials
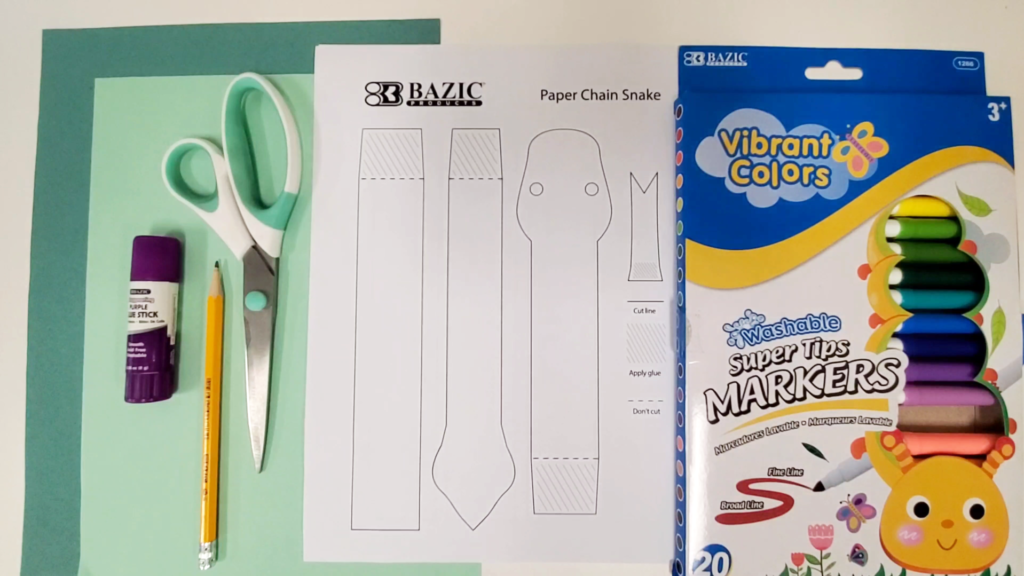
Step 2: Cut out Snake Template (Page 1 only)

Step 3: Trace template onto construction / color paper
For the “Body”, you can make as many as you like
You may also color / decorate at this Step

Step 4: Cut out

Step 5: Starting with the Head, apply glue (see template), and roll the paper to create a ring
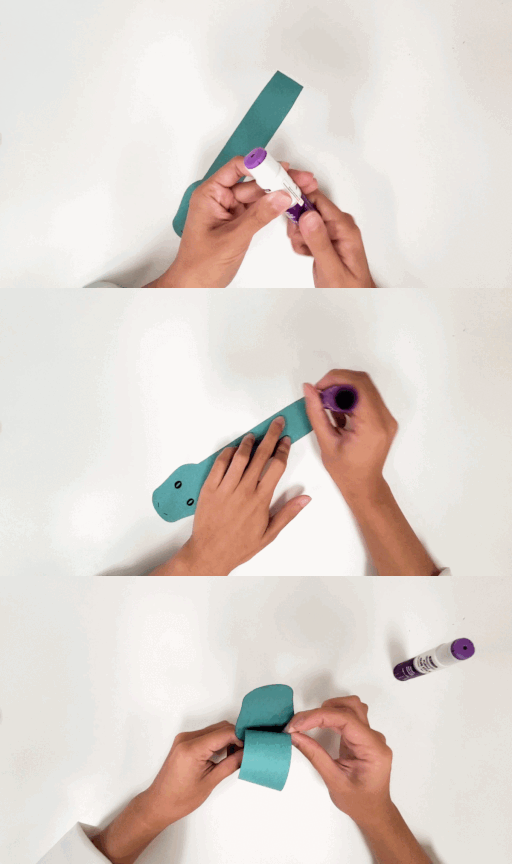
Step 6: Chain “Body” parts after the “Head”
Apply glue, insert paper through ring, and roll to create another ring
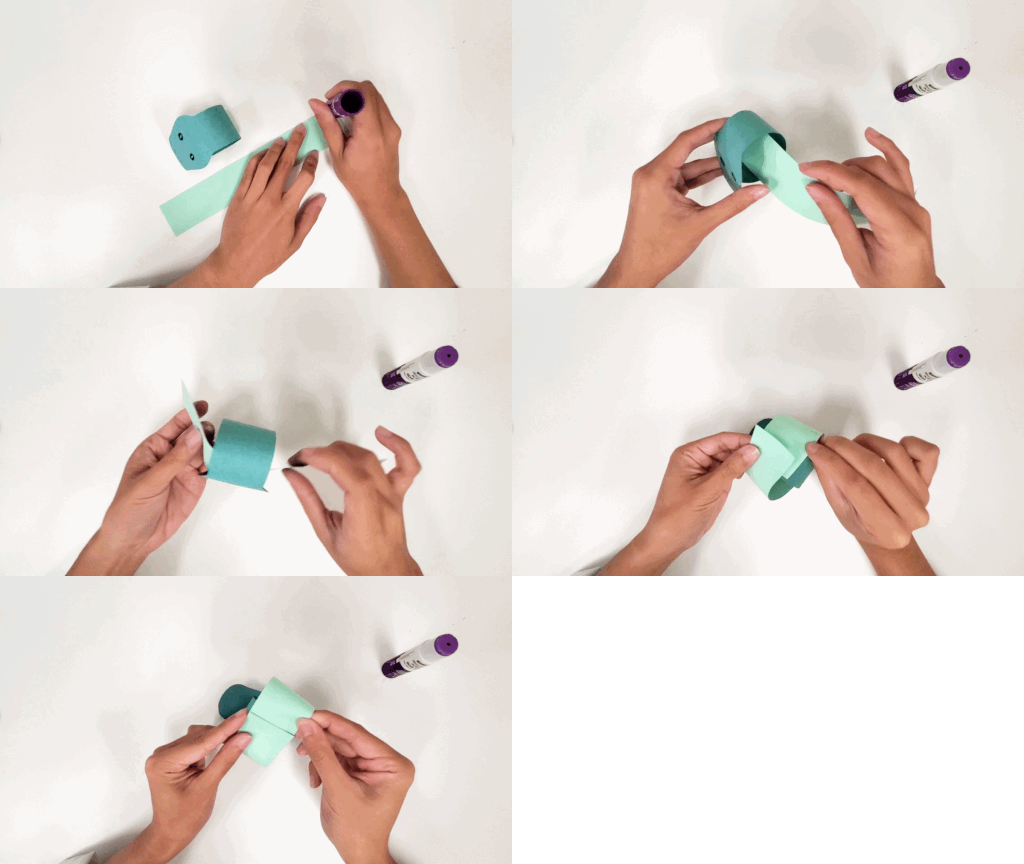
Step 7: For the Tail, make sure it is facing this way (refer to photo)
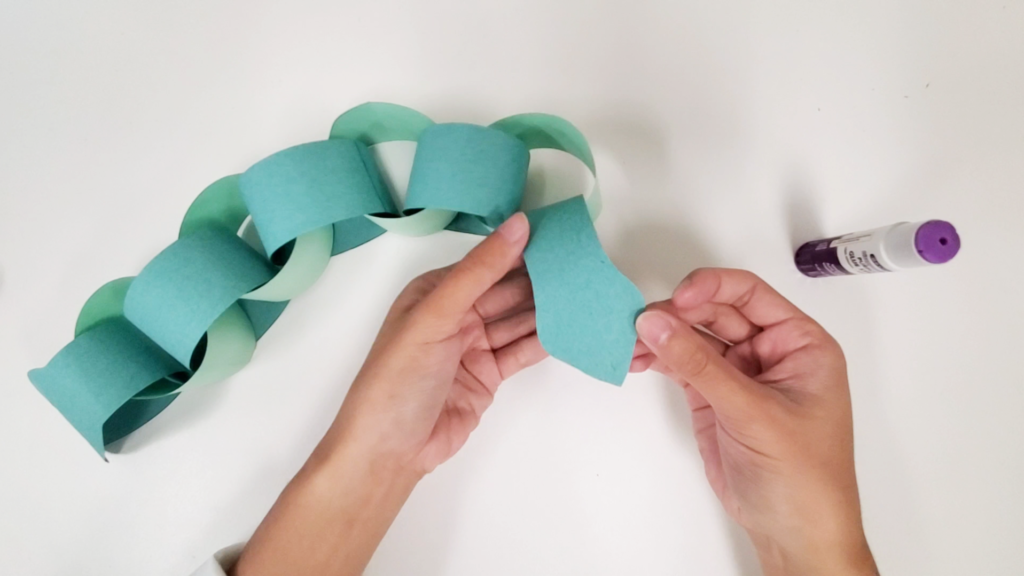
Step 8: Glue Tongue to Head piece

Step 9: Enjoy!
Watch our step-by-step tutorial to create your Paper Chain Snake DIY:
And if you’re local to Los Angeles County, gather the kids and RSVP to Plaza West Covina‘s Movie Night! Here, your children will get to make this fun and slithering craft in-person with all our materials listed above, all while enjoying the movie Jungle Cruise, family entertainment, games, and giveaway on Tuesday, August 9th from 6PM – 10PM!
For more information, click the RSVP link above. See you there! 😄
Check out our last DIY craft here.
